1. What is DAW?
A DAW (Digital Audio Workstation) is music production software used for recording, editing, and creating music. Common DAWs include Cubase, GarageBand, Logic Pro, FL Studio, Ableton Live, and Studio One.
If you want to use PocketDrum to trigger drum samplers, virtual instruments(VST, or software instruments), or record MIDI performances on your computer, you can connect it to a DAW and use it as a MIDI controller.
2. Can I use my PocketDrum as a MIDI Controller?
PocketDrum can work as a MIDI controller when connected to a PC or Mac using an adapter and a Type-C data cable that supports MIDI signal transmission.
In most cases, once the connection is established successfully, your DAW can detect PocketDrum as a MIDI input device. No special driver setup may be required, depending on the DAW and operating system.
3. Compatible DAWs
PocketDrum is designed to work with DAWs that support standard MIDI input.
Based on current testing, PocketDrum can be recognized in Cubase 12 Pro, Logic Pro, and GarageBand as a MIDI input device named USB MIDI.
Other DAWs that support MIDI input may also work, but the setup steps can vary by software version and operating system.
| Platform | DAW | Features | PD Compatible |
| Windows / macOS | Cubase | Professional editing tools for MIDI, harmony, VariAudio audio editing, precise video music sync, and advanced MIDI/audio editing. | ✓ |
| Windows / macOS | FL Studio | Strong in electronic music, simplified piano roll, step sequencer, automation clip editing, and lifetime free updates. | TBD |
| Windows / macOS | Studio One | All-in-one (editing+mixing+mastering), supports live performances, ARA deep integration with Melodyne. | TBD |
| Windows / macOS | Reaper | Extremely lightweight (15MB install), deep interface customization, cross-platform, and low resource usage. | TBD |
| Windows / macOS | Ableton Live | Instant music creation, real-time triggering via Session View, and Max for Live support custom plugin development. | TBD |
| macOS | Logic Pro | Mac exclusive, optimized performance, smart tempo, AI-assisted composition, deep integration with Final Cut Pro. | ✓ |
| macOS | GarageBand | Beginner-friendly, mobile-compatible, touch interface, auto accompaniment, iCloud sync across Apple devices. | ✓ |
| Windows | Cakewalk |
Fully free professional DAW, 64-bit mix engine, ARA support, VST3 support, ideal for budget-conscious creators. |
TBD |
4. Before You Start
Before connecting PocketDrum to your DAW, make sure the following requirements are met:
- Your PocketDrum adapter is powered on.
- You are using a Type-C data cable that supports MIDI signal transmission. Charging-only cables may not work.
- Your PC or Mac recognizes the connected device properly.
- Your DAW is installed and ready to receive MIDI input.
5. Connection Method
To connect PocketDrum to your computer for DAW use:
- Turn on the PocketDrum adapter after.
- Connect PocketDrum to your PC or Mac through the required adapter. You can find your PocketDrum show as USB MIDI in your other devices list as follows:
- Use a Type-C data cable that supports MIDI signal transmission.
- Open your DAW after the connection is complete.
- Check whether the DAW detects PocketDrum as a MIDI input device.
In most cases, PocketDrum can be used directly as a MIDI controller once connected successfully.
Cubase Setup
1. Tested Version
The following setup was tested in Cubase 12 Pro.
2. Device Name in Cubase
In Cubase 12 Pro, PocketDrum appears as: USB MIDI. When selecting the MIDI input source for your track or instrument, choose USB MIDI.
3. Set Up Steps in Cubase
A. Turn on the PocketDrum adapter > Connect the adapter to your computer.
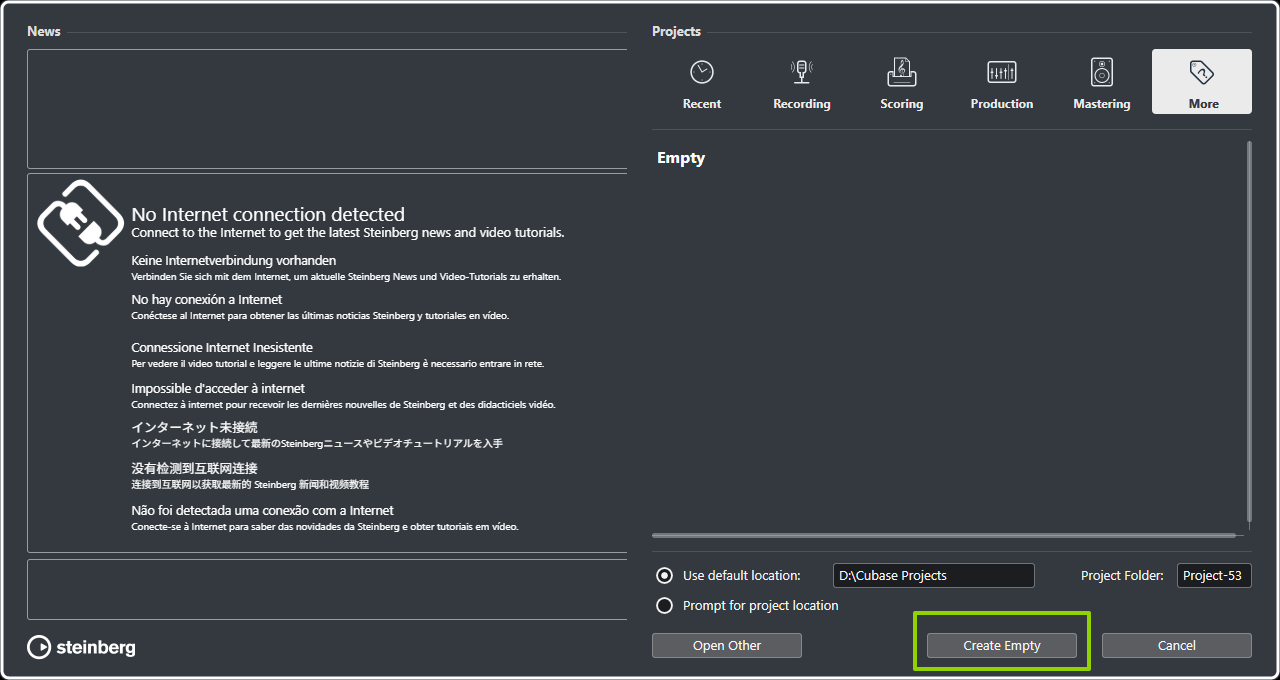
B. Open Cubase > Create a new/empty project.
C. Create a new instrument track or MIDI track. We will create an Instrument Track, for example:
D. Choose the VST your preferred.
E. In the track input settings, locate the MIDI input device list > Select USB MIDI as the input source.
F. Start playing PocketDrum to test whether MIDI notes are being received correctly.
If the software is connected successfully, PocketDrum can be used to trigger drum sounds and record MIDI performance in Cubase.
Logic Pro Setup
1. Tested Version
The following setup was tested in Logic Pro version 10.7.5.
2. Device Name in Logic Pro
In Logic Pro, PocketDrum appears as: USB MIDI. When selecting the MIDI input source in the MIDI settings, choose USB MIDI.
3. Set Up Steps in Logic Pro
A. Turn on the PocketDrum adapter > Connect the adapter to your Mac.
B. Open Logic Pro, then click the Logic Pro tab on the top-right screen > Choose Settings > Click MIDI.
C. Select the Inputs tab > Make sure that you have chosen USB MIDI as your preferred MIDI port.
D. Select Empty Project > Click Choose.
E. Choose Software Instrument > Click Create.
F. Select "Drum Kit" or a related sound through Sound Library > Choose your favourite sound.
G. Start playing PocketDrum to test whether MIDI notes are being received correctly.
GarageBand Setup
1. Tested Version
The following setup was tested in GarageBand 10.4.12
2. Set Up Steps in GarageBand
A. Turn on the PocketDrum adapter > Connect the adapter to your Mac.
B. Open GarageBand > Create a new/empty project.
C. Select MIDI > Click Create.
D. Select "Drum Kit" or a related sound through Sound Library > Choose your favourite sound.
E. Start playing PocketDrum to test whether MIDI notes are being received correctly.
FL STUDIO Setup
Tested Version
The following setup was tested in FL STUDIO 2025 Trial v25.2.5 [build 5319] Windows - 64Bit
Device Name in FL STUDIO
In FL STUDIO, PocketDrum appears as: USB MIDI. When selecting the MIDI input source in MIDI setting, choose USB MIDI.
Setup Steps in FL STUDIO
A. Turn on PocketDrum adapter > Connect adapter to your computer
B. Open FL STUDIO > Select Options - MIDI Settings
C. Make sure USB MIDI is in the MIDI Input list > Click USB MIDI > Select Enable to activate your PocketDrum
D. Go back to the main interface > Drag and select to load your VST to track
E. Start playing PocketDrum to test whether MIDI notes are being received correctly
REAPER Setup
Tested Version
The following setup was tested in REAPER v7.67
Device Name in REAPER
In REAPER, PocketDrum appears as: USB MIDI.
Setup Steps in REAPER
A. Turn on PocketDrum adapter > Connect adapter to your computer
B. Open REAPER > Select Options - Preferences
C. Choose MIDI Inputs in Audio tab > Make sure USB MIDI is in the list > Right-click Input of USB MIDI>Select Enable input for track record input to activate your PocketDrum
D. Go back to the main interface > Right-click to insert virtual instrument on new track
E. Select a preferred VST > Start playing PocketDrum to test whether MIDI notes are being received correctly
Cakewalk Sonar Setup
Tested Version
The following setup was tested in Version:2026.02 (Build 078, X64)
Device Name in Cakewalk Sonar
In Cakewalk Sonar, PocketDrum appears as: USB MIDI. When selecting the MIDI input source in MIDI setting, choose USB MIDI.
Setup Steps in Cakewalk Sonar
A. Turn on PocketDrum adapter > Connect adapter to your computer
B. Open Cakewalk Sonar > Right-click track range > Click Insert instruments
C. Select your VST > Choose USB MIDI as your MIDI input > Assign your MIDI Channel
D. Start playing PocketDrum to test whether MIDI notes are being received correctly
6. Troubleshooting
If PocketDrum is not detected in your DAW, check the following:
- Cable Compatibility: Make sure you are using a Type-C data cable that supports MIDI signal transmission. A charging-only cable may power the device but will not transmit MIDI data.
- DAW Input Selection: In DAW, confirm that the selected MIDI input device is USB MIDI.
- Device Reconnection: Disconnect PocketDrum, reconnect it, and then restart the DAW if needed.
- Operating System Recognition: Check whether your PC or Mac recognizes the connected MIDI device before opening the DAW.
Notes
- DAW setup steps may vary depending on the DAW version and operating system.
- PocketDrum may appear under different input-management menus in different DAWs.
- The currently verified device name is USB MIDI.
Want to know more?
▶ Video guides:
👥 Connect with other users:
🌐 Official social media channels:
For additional assistance, please refer to the included manual or contact AeroBand customer support at support@aeroband.net.